[OLD] How to Get More Void Ore – The Truth behind Yield Boost and Double Proc
Edit 2: The information in this article might no longer be accurate according to a recent post by user SkyLineOW on Reddit, since all the tests we ran can be a false positive due to additional unknown variables.
Edit 1: Clarification that "over 50%" means at least 51%.
Gathering [item_voidore] from mining is a lengthy process, as some of you may already know. While I won't go into much details about the drop rates for it - as that requires an article on its own - I'm gonna tell you one thing: get more luck! A lot more. Ignoring the numbers shown on luck descriptions, the reality is that, as your luck goes up, your drop chance at the rare stuff increases exponentially. Now, lets get back to Yield and how to get double proc.
Yield Mechanic
Yield is a simple number that multiplies the amount of items you get, simple enough. For example, if you drop 8x [item_ragehidet1], a 20% Yield Boost would make that become 9.6x which gets rounded to 10x.
This is very important when it comes to resources that always drop in a 1x quantity, such as [item_voidore], [item_quillbarkt1], [item_crystalt3] and many others (you can see the quantity they drop in and the minimum luck you need, if any, by searching the item on our database and checking the loot tables). From a technical point of view, if you at least 51% Yield Boost, any drop quantity of 1x will become 2x (1×1.51=1.51, rounded to 2). And yes, this means, that with 51% Yield Boost, you will always get 2x of the important stuff when gathering.
Yield Sources
Lets dig into how exactly you reach 51% Yield Boost now. The following list will contain all the possible sources for this:
- 10% Yield Boost from having 250 Strength.
- 15% Yield Boost from the [item_proficiencyboostert5] - this is the highest tier booster available.
- 20% Yield Boost from the Lifestyle Buff.
The games doesn't show that, but all the gathering Lifestyle Buffs offer that boost for their trade skill.The bonus from the Lifestyle Buff that the game doesn't expose is actually the 500 luck, which would be equal to something like [perk_perkid_armor_miningluck]. Note: you must own a house in that Town in order to receive bonuses from Lifestyle Buffs and they only apply in that specific territory. Owning multiple houses in that Settlement won't multiply your buff. - 5% Yield Boost if your faction owns the Castle Windsward fort. The game UI/Map says 10%, but the internal data strongly suggests that it's actually 5%.
- 19% Yield Boost from the Pick Axe perk (at 600 Gear Score) [perk_perkid_tools_miningyield]. Note: just because the game says x%, it doesn't mean it's exactly that, since the game UI rounds the perk values shown. The database will usually show you raw values, so you can do your math accurately.
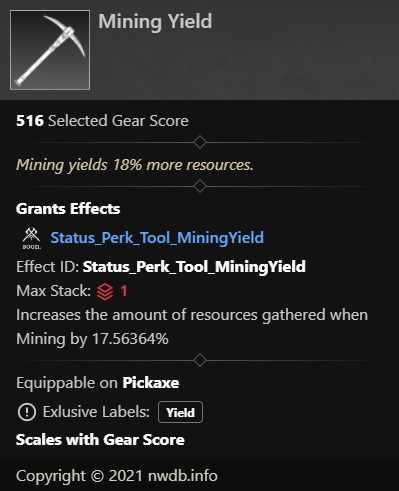
All of the above will put you at a 69% Yield Boost, which in reality, guarantees that anything that drops in a quantity of 1 from mining, will become 2. Note: without the 20% bonus from the Lifestyle Buff, you cannot reach the 51% needed for the double proc, because the Castle Windsward buff is not showing the correct boost value.
A combination of buffs that could get you to the needed 51% Yield Boost for double proc would be: 10% from 250 Strength, 20% from the Lifestyle Buff, 5% from [item_proficiencyboostert2] and 16% from [perk_perkid_tools_miningyield] on a 430 Gear Score [item_2hpickt3]. The perk will only go to a little bit over 19% at 600 Gear Score, so you will always need either a booster or Castle Windsward ownership to reach 51% Yield Boost.
The +10% Gathering Bonus when your faction controls a territory doesn't seem to increase yield - on that front, I feel like it doesn't actually do anything according to the internal data. This requires some more testing.
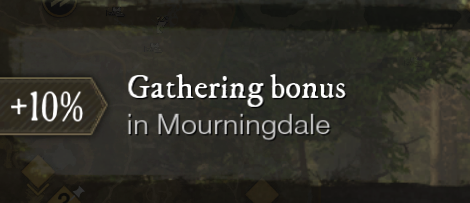
Special thanks to user Silvera for bringing up the Gathering bonus and testing all the math present in this article!
Hopefully this will make your [item_voidbentingot] journey easier, given the extremely low chances for [item_voidore] to drop. I will probably follow up with an article that dives into the luck side of things, with some proper drop chance numbers.
Stay safe in Aeternum!